
This is a special post for students wanting help building their portfolio backdrop and anyone else who's interested in how I put mine together :)
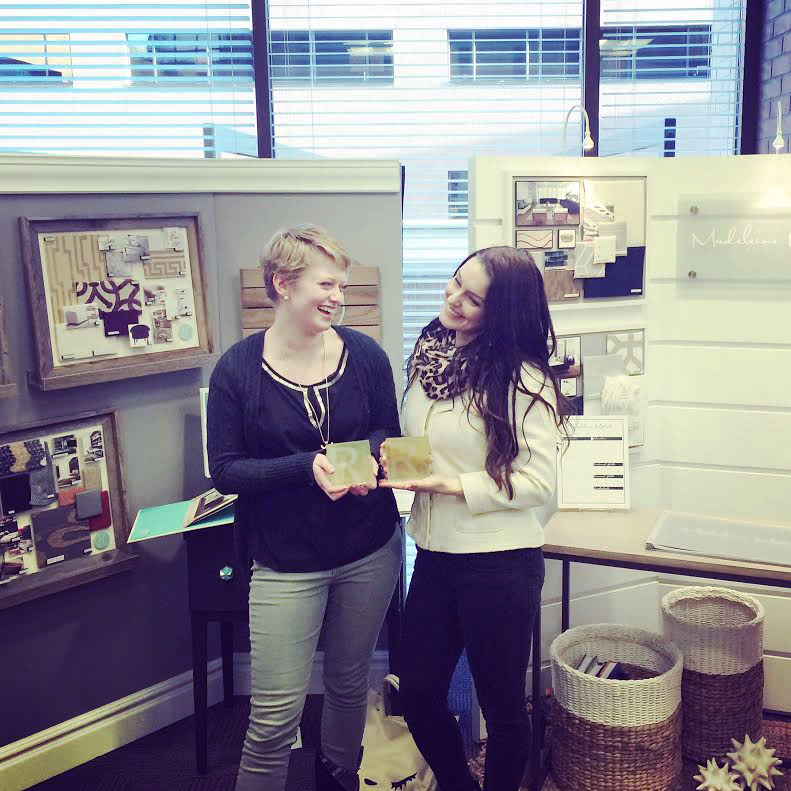
For those who don't know, at LDS Business College part of putting together our portfolios included making a display or vignette to show off our brand/style. The actual portfolio book was part of this display, usually lying on a table.
My display took a good two months to design, construct, and refine. It also cost me over $400, but the result was just what I was hoping for and I think it really showed off my personal brand!
The Design
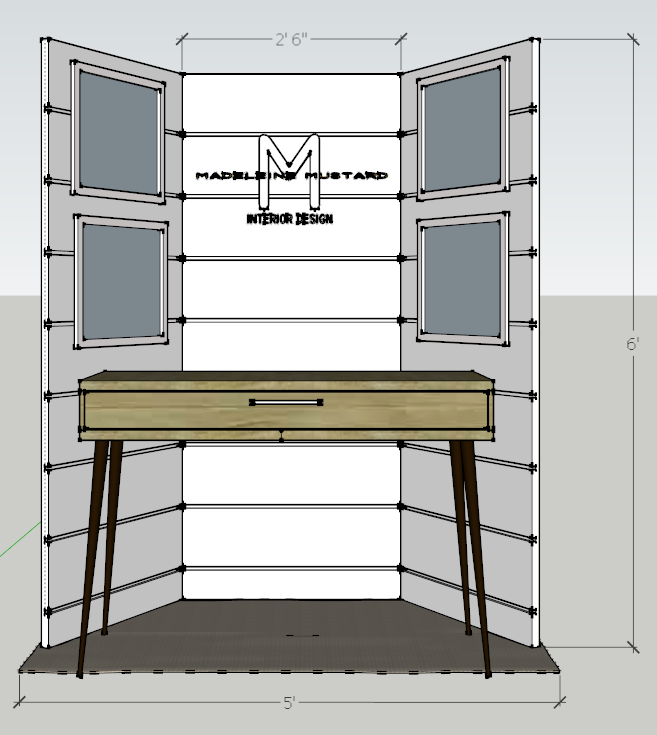
Looking at last year's students' displays was a jumping off point for what to build as a backdrop. We students were also given strict limits on depth, width, and height (40" x 60" x 72")
I wanted my backdrop to be fresh, clean, modern, and to have some architectural interest. I also wanted to represent my love of the ocean in a subtle way.
I came up with a simple color scheme of white, navy blue, and natural tones. To make the display feel inviting, I went for a 3-panel design that angled out towards viewers (I felt like the openness drew you in). I combined the architectural interest and ocean aspects together by applying horizontal panels to the doors.
I began with a hand sketch, and then improved my backdrop design in SketchUp.
After designing the display, figuring out measurements and angles, and breaking it down into its parts, we went shopping for materials and supplies.
The Shopping Trip
We purchased 3 primed hollow core doors from The Home Depot ($25/ea.) to be the main structure of my display. The horizontal panels were planks of 8" wide primed MDF ($15/ea.) and attached with liquid nails ($2.50/ea).
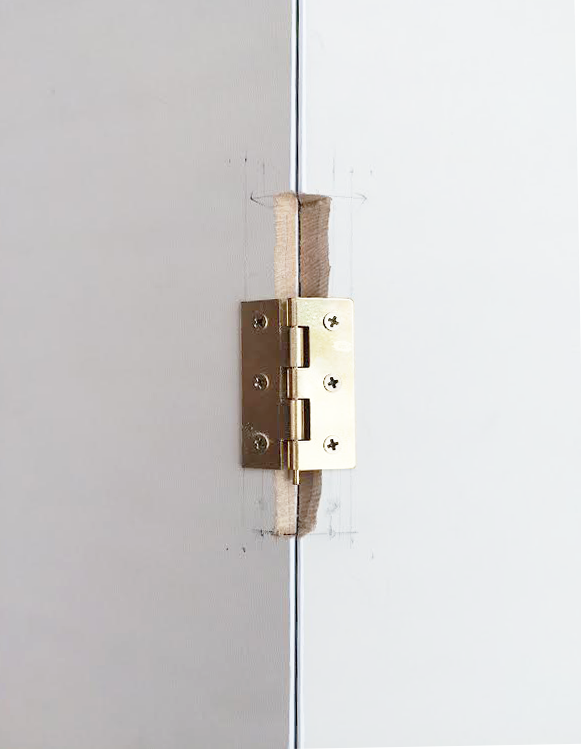
We bought lay-flat hinges ($3/pack) to attach the doors in the back. Rubber feet ($2/pack) were used to give the doors something to "stand" on. We bought 90 degree framing angle brackets ($0.5/ea.) to attach the lighting to the back (more on that later). Wood screws ($4) were used to attach the lighting brackets and to hang up my framed color boards. We painted the backdrop in Super White by Benjamin Moore ($15/pint). To give everything a nice, clean finish we caulked the edges where the MDF panels and doors met.
We also purchased frames ($10/ea.) for my color boards and 3 lights ($15 ea.) to illuminate my display from IKEA.
Shopping list:Pretty pricey! I went into this expecting to pay half as much, but somehow things added up really quickly!
- 3x Hollow core doors ... $75
- 7x MDF planks ... $108
- 2x Liquid nails ... $5
- 6x Hinges ... $6
- 2x Rubber feet ... $4
- 3x Brackets ... $1.5
- Screws ... $4
- 4x Frames ... $40
- 3x Lights ... $45
- 2x cans Paint ... $30
- Painting tools ... $15
- 1x Caulk ... $3
- 4x Color board frames ... $40
TOTAL= $421.5
- 3x Lights ... $45
I just want to point out to anyone who is about to build a display that there were many students who spent way less than I did (but also some who spend just as much or more), and it's really up to what you're willing to spend, what you want built, and where you're willing to look for materials. My MDF planks took the price up quite a lot, but then I was really wanting the architectural element they brought. Another option could be to use bead-board, or to paint stripes which I believe some other students did for their displays.
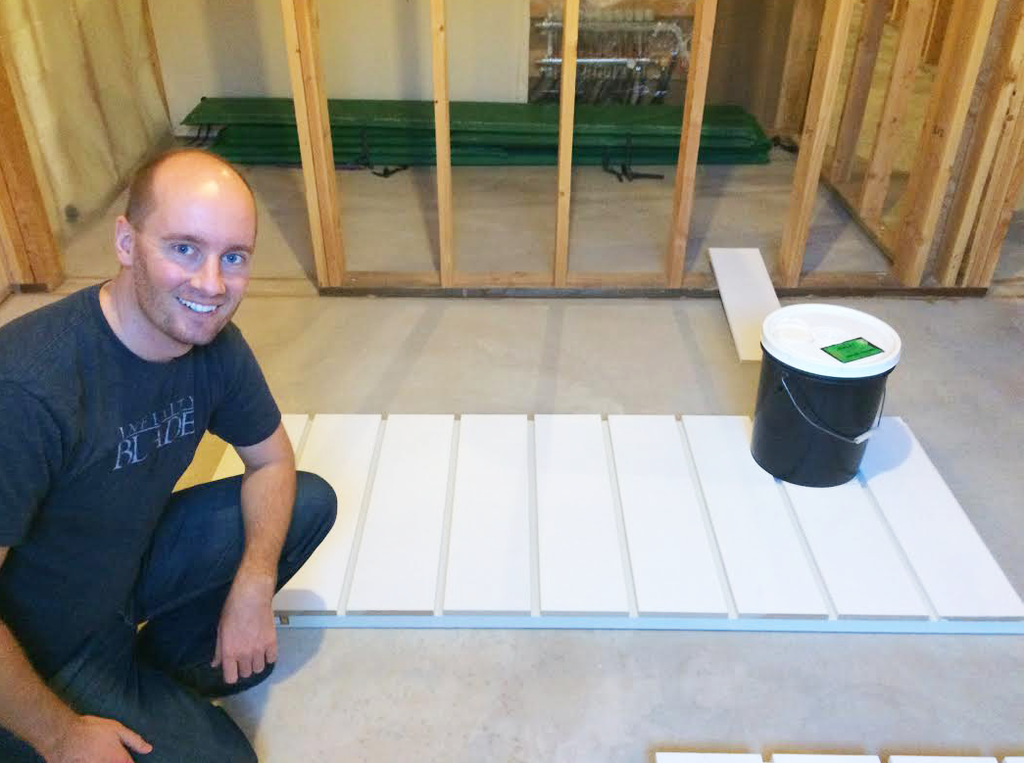
The Construction Part 1
Thank Heavens for my amazing father-in-law! He was the guy with the garage and tools for this project, and I don't know what we would have done without him!
The nice people at The Home Depot cut the MDF planks to size for me, so when we got to work at my in-law's house, we used a saw to cut the doors down to the 72" height limit.
Once that was done, we laid the doors on the ground and attached the MDF panels with liquid nails. To keep the planks from moving around while drying, we spaced them with shims my father-in-law had on hand that happened to be 1/2" thick- exactly the size of gap between planks I'd planned for!
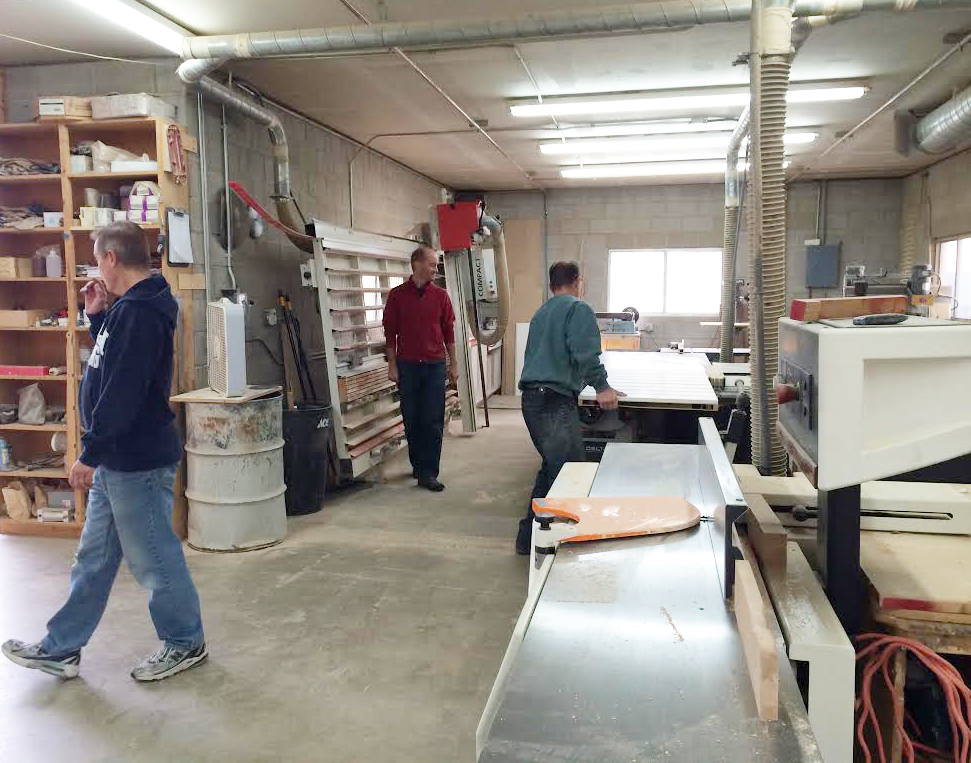
My father-in-law also had a cabinet maker friend with a nice big workshop and table saw. He cut angles in the back of the doors so that they would butt up against each other nicely at the angle we'd planned for. Thanks Andy!
The next step was caulking and painting. The caulking job was achieved using a caulk gun, a damp rag, and our fingers. Since the doors and MDF planks were already primed, we could get right to the painting part. My husband Geremy and I took turns painting on top of the MDF and the gaps between the panels.
The Construction Part 2
Once the doors were cut, caulked, and painted, it was time to join the 3 doors together. We achieved this by affixing six lay-fat hinges on the back corners of the doors like so:
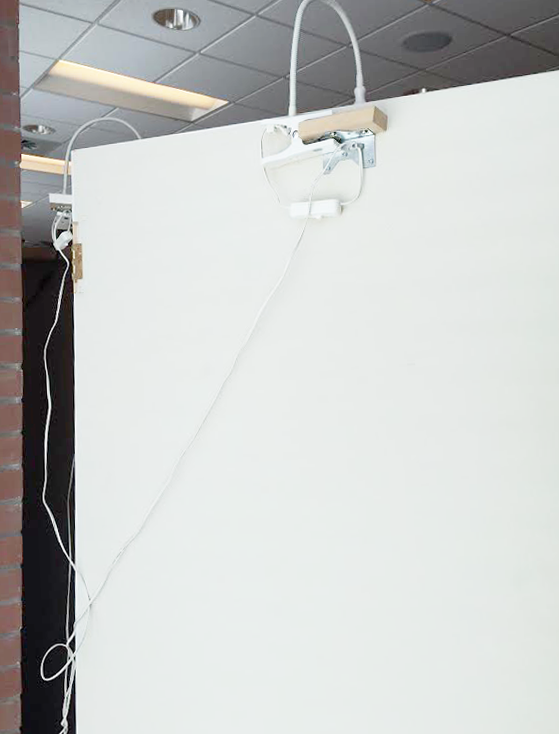
To affix the lights, (I bought mine from IKEA) we screwed a scrap piece of MDF to a 90 degree bracket to which we clipped the light.
Since I spent so much on the display itself, I wanted to save money by using accessories around the house to decorate my vignette. Although if I'm being perfectly honest, I did purchase the table for this project! I got it here from West Elm and I absolutely LOVE it. By the way, did you know that they give 15% off student discounts? Sign up here.

Voila! The finished product.
If you have any questions, feel free to comment below and I'll see if I can help. Good luck!


.jpg)


No Comments Yet, Leave Yours!